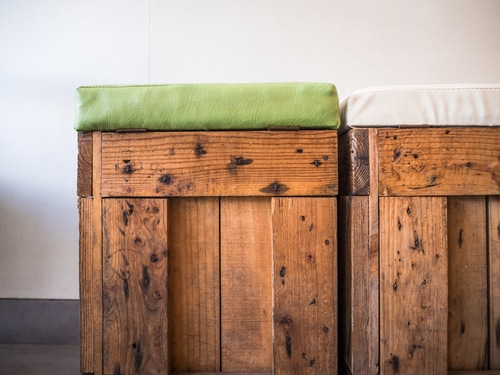
Are your kids always breaking things? Don’t know the value of money? Can’t appreciate good furniture? It’s time to go all Better Homes and Gardens on your child and build them an ottoman of their own. Personalised and thoughtful gifts are always appreciated more, and homemade furniture, like a wooden pallet ottoman, is no exception.
Ottomans are loved for their many qualities and multipurpose nature. Want to put your feet up? They can do that. Have the family over and need more seating? They can do that too. Withstanding any task, and looking fabulous whilst doing it, the Ottoman is a winner in any room, even your child’s room.
Pros of a Pallet Ottoman
An ottoman is an obvious addition to any room, and apart from just looking good, it has several practical qualities. Ottomans were initially designed to provide seating, dating back to the 18th century in Turkey. Today, they are still used for seating, but they also offer additional space for storage, or to hide things – like clutter. Using wooden pallets in this DIY project is also a smart way to save money and give your home a timeless and rustic look that even your kids can appreciate.
This rustic wooden ottoman dating back to 18th century Turkey might be the play time inspiration your kids need to give you a few quiet hours.
Everything You’ll Need:
1 Wooden Pallet
Castor Wheels or Stationary Legs
Screws
Screwdriver
Foam Cushioning
Material/Cloth to cover
Staples
Glue
Creating the Wooden Pallet Base
Sometimes you have to make tough decisions. Before you do anything else, decide whether you want to paint your ottoman with colour or simply treat the wood to honour rustic design.
Once the paint has dried, you can make your ottoman mobile by screwing castor wheels to the bottom side of a wooden pallet – but sometimes, non-moving furniture is the safest option. If you choose to add four legs to your ottoman instead, screw them on now.
Making the Seat
Use thick cushioning, such as upholstery foam in layers to achieve a cushioned seat in your desired thickness. Make sure to secure it with glue so that it doesn’t move around too much during use.
The final step requires you to cover your seat pad with a material or cloth of your choosing – why not try something colourful, like your child’s favourite colour. Finish it off by carefully stapling and gluing your cushion to the wooden base.
Customising Your Ottoman
If you want more of a challenge, why not make the cushioned seat a lid by adding hinges and a wooden board underneath. It’ll be handy for storage and you can add a personal touch by hiding something special inside for your child to find.
Once you’ve completed your Ottoman, there’s nothing left to do but relax. Unless your kids are still breaking things. If that’s the case, you could always make the rest of their furniture from wooden pallets so that it is cheap and easy to repair or replace.
Related News

The Versatility of DIY Pallet Furniture
In the world of interior design and home decor,...
Keep Reading
What Can You Make Out Of Wooden Crates?
If you’re looking for a simple yet effective DIY...
Keep Reading
Using Old Wooden Pallets For Making Raised Garden Bed
If nothing else, COVID-19 has shown us the importance...
Keep Reading
 Enquire Today